

React Native stands out as one of the top frameworks for crafting mobile applications. According to Statista’s 2022 data, a whopping 32% of developers were opting for React Native, while 46% were favoring Flutter.
It’s no wonder, given its incredible capabilities and versatility, that React Native has played a pivotal role in shaping applications like Facebook, Instagram, Skype, Airbnb, and Uber Eats. In this blog post, we’re diving headfirst into the realm of React Native app development for Android.
What Is React Native?
React Native is an advanced framework based on the widely-used React library, primarily employed for crafting user interfaces on web pages. This framework enables you to employ the same programming techniques and architecture found in React, creating mobile applications for both Android and iOS. But how does it pull this off? Well, the framework taps into native OS interface components, ensuring that your apps feel as if they were natively coded.
To make this happen, React Native employs a specialized abstraction layer known as a „bridge.” This bridge facilitates communication between JavaScript and native code, all using JSON as the underlying format. This, in turn, allows you to call native functions from JavaScript and vice versa.
For a deeper dive into the capabilities of React Native, check out our earlier publication titled „Why use React Native for mobile app development?” where we delve into the definition and advantages of utilizing this framework.
Creating Android Apps in React Native – 6 Key Steps
You can streamline the process of developing Android apps in React Native by following the steps below. We’ll break this down into seven stages to yield the best results within the shortest possible time frame.
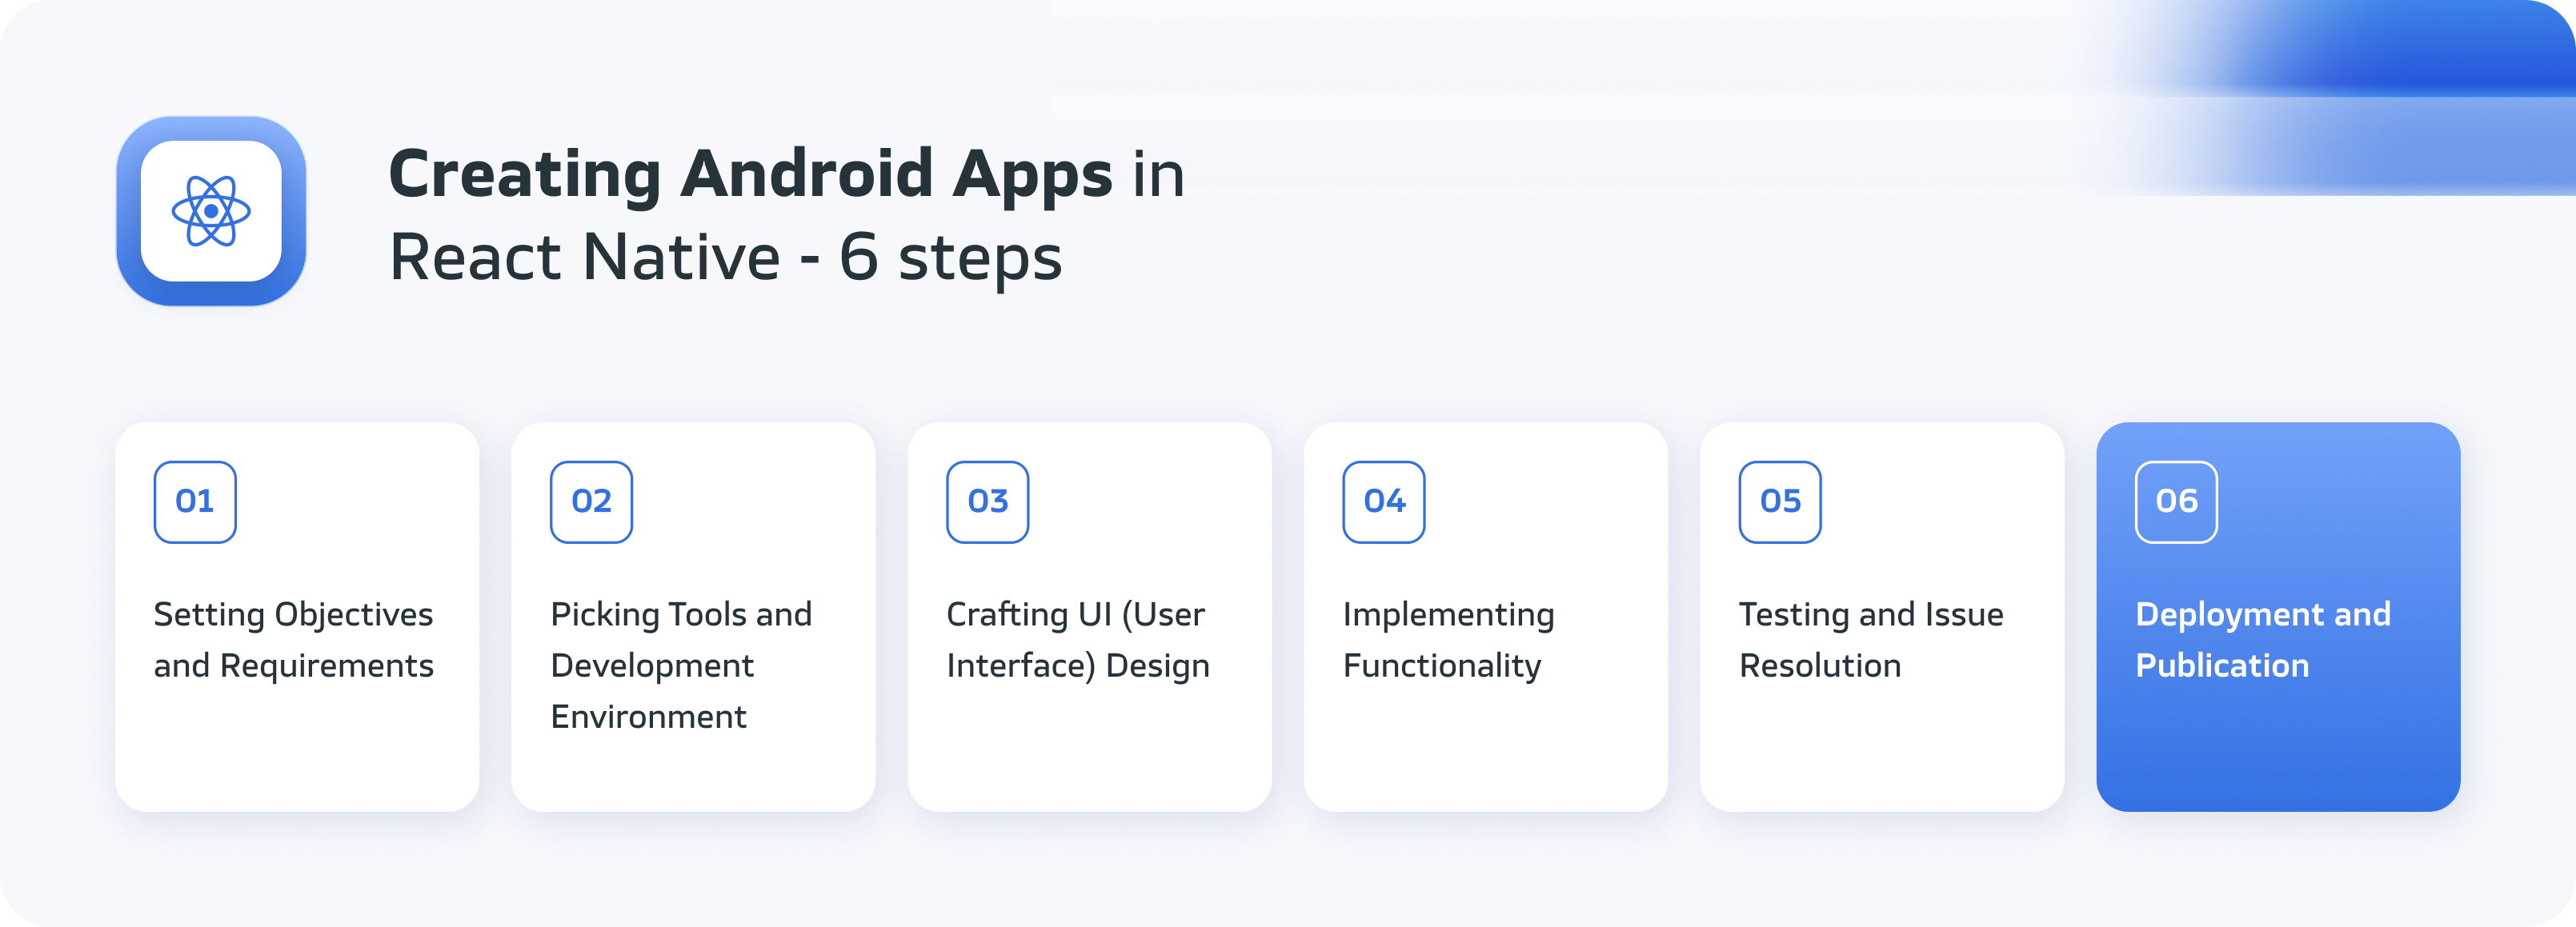

Step 1: Setting Objectives and Requirements
Kicking off React Native app development involves establishing the project’s objectives and requirements. This stage holds immense significance since it profoundly impacts the project’s shape.
Understanding user needs and expectations
Understanding user needs and expectations is paramount. There are various approaches to tackle this, with professional product workshops proving incredibly beneficial. Alongside workshops you should consider:
- Market research and competitive analysis: Delving into the market and scrutinizing competitors aids in comprehending what users genuinely expect from your app.
- Interviews and surveys: Engaging in direct conversations with potential users yields insights into their opinions and needs.
- Creating personas: Crafting fictional characters representing diverse user groups helps better understand their behaviors and expectations.
Functionality Analysis and Guidelines
Functionality is the set of features and capabilities that an application should provide to its users. Guidelines establish the standards to which the application should adhere in terms of quality, security, accessibility, and compliance with relevant regulations. To conduct such an analysis, it’s beneficial to utilize the following tools:
- Creating a list of functionalities and prioritizing them: Compile a comprehensive list of all the features that the application should have and determine which ones are the most crucial.
- Use case diagrams: Develop graphical representations of various usage scenarios for the application to understand which functions might be necessary in different situations.
- Requirements specification: Provide detailed descriptions of the requirements concerning functionalities, behaviors, and the appearance of the application.
- Technical documentation: Create documentation that describes the technical aspects of the application and its components.
Step 2: Picking Tools and Development Environment
Selecting the right tools influences the efficiency and quality of developer work. You’ll want answers to the following questions to make this decision a breeze:
- Which code editor or development environment should you embrace?
- What package manager should you opt for?
- Which emulator or simulator should you employ?
- What libraries or supplementary tools should you bring into play?
Popular Tools and Choices:
- Code editors/IDEs: Visual Studio Code, Atom, Sublime Text, and WebStorm make the list.
- Package managers: Consider npm or yarn.
- Emulators/simulators: Android Studio, Xcode, Expo.
Libraries and supplementary tools: Explore options like React Navigation, React Native Elements, React Native Paper, Redux, and Firebase.
Step 3: Crafting UI (User Interface) Design
The third phase in React Native app development revolves around designing the user interface (UI). Your team will be sketching out wireframes with a focus on creating an appealing design and an intuitive user experience. Before diving into design, it’s imperative to address some key questions:
- How should the app visually appear?
- What are the app’s chosen colors, fonts, icons, and graphics?
- What UI elements are in play, and what are they named?
- What are the selected layouts and navigation styles for the app?
Core Principles for Android UI Design:
- Adaptability across different screen sizes: Ensuring your app looks pristine on various devices, regardless of screen size.
- Embracing simplicity and minimalism: Steering clear of an overload of UI elements, simplicity paves the way for smooth navigation.
- Mastering contrast and hierarchy: Maintaining a suitable difference between UI elements and establishing a clear information hierarchy.
- Leveraging recognizable symbols and gestures: Using widely recognized signs and gestures to heighten UI usability.
- Providing feedback and communication: Offering transparent feedback on the app’s current state and user actions.
Step 4: Implementing Functionality
In the implementation phase, you’ll cook up the code that takes care of all app functions and operations. This is where seasoned developers take center stage, constructing logical mechanisms and algorithms. If you’re feeling a bit short on skills or experience in this realm but don’t plan to expand your in-house development team, outsourcing is a viable option. Hiring a complete team or individual developers allows you to tap into essential skills without incurring additional costs.
Step 5: Testing and Issue Resolution
The fifth step in creating a React Native app involves rigorous testing and ironing out any issues. Your app will be tested for correctness, performance, security, and usability.
Unit Testing and End-to-End Testing:
Unit testing ensures the accuracy of individual functions or components in isolation. End-to-end testing assesses the app’s functionality as a cohesive whole or in parts. Various tools and libraries are available for crafting and executing unit and end-to-end tests in React Native, such as Jest, Enzyme, and Detox.
Step 6: Deployment and Publication
The final leg of the React Native app development journey centers on deploying and publishing the finalized app. The primary goal here is to prepare the app for release on Google Play.
The Google Play Publication Process:
- Create a Google Play developer account and complete the registration fee payment.
- Develop an app profile and input details such as name, description, icon, category, and age rating.
- Generate an APK or AAB file containing the app’s code and resources.
- Upload the APK or AAB file to Google Play, including version and change information.
- Incorporate screenshots, promotional videos, and graphics on the Google Play store page.
- Configure pricing and distribution information, alongside setting up payment methods.
- Submit the app for Google Play review and await approval.
- Finally, publish the app on Google Play and keep an eye on its statistics and user reviews.


Key Insights
The process of crafting Android apps is undeniably intricate, calling for an extensive array of skills and an advanced toolkit from developers. However, thanks to React Native, you can efficiently churn out attractive and functional Android mobile apps within a reasonable time frame.
React Native offers a host of advantages, such as user-friendliness, an extensive library and component ecosystem, and stellar performance.
If you’re itching to create your very own Android app in React Native, don’t hesitate to get in touch with us. Our experts boast extensive experience and a diverse portfolio of projects developed using React Native. We’re here to help you bring your vision to life and craft an app that aligns perfectly with your expectations.
FAQ
Can React Native be used for Android?
Certainly, React Native offers a seamless integration of native development and React, a premier JavaScript library. This versatile framework can be applied to both existing Android and iOS projects or serve as the foundation for entirely new applications.
What language is React Native Android?
React Native leverages JavaScript as its primary language for crafting cross-platform applications. JavaScript enjoys widespread popularity within the web development community and seamlessly integrates with React and other prominent JavaScript frameworks.
Why employ React Native in Android?
React Native stands out as an exceptional choice for mobile app development. It delivers a polished, responsive user interface while significantly reducing loading times. Furthermore, it offers cost and time efficiency compared to native app development, all without compromising on quality or functionality.
Does Facebook still use React Native?
Facebook’s departure from React Native stemmed from a combination of financial and technical considerations. The substantial financial investment made in the project did not yield the expected returns, prompting the company to discontinue its usage.
Will Flutter replace React Native?
Predicting the future of mobile development frameworks is challenging. However, it is unlikely that Flutter will entirely supplant React Native in the foreseeable future. Both frameworks possess distinct advantages and disadvantages, with the selection between them typically hinging on the specific requirements of individual projects.


